Thursday, March 22, 2012

Simply Scored Diagonal Plate!

Hello friend!

It seems lately that every post I make starts with "sorry it has been such a long time...."  And unfortunately it will be a little longer yet... but let me share a fun video with you! 

This video shows a new add-on item called Simply Scored Diagonal Plate (Item #125586 for only $11.95) which can be used to make envelopes and anything with diagonal scoring.  You must have the Simply Scored tool to use it (Item #122334, for $29.95).

Check this out!


Ok, now back to preparations for my Overnight Stamp Camp tomorrow.  I know I have not talked about it much here, but there are a couple openings if you are interested!

Happy Stamping!
Wendy

Monday, February 13, 2012

Warm things!

Hello friend!

Last Friday night was our annual Father/Daughter Dance at Trinity.  We had a luau!   I have to share some photos:

The entryway.  (Don't you love the palm trees?  They were made by high school students for prom and homecoming last year.  They didn't have a place to store them, so we saved them from going into the garbage and stored them for our luau.  The neat thing is, we are now able to pass them back to prom committee for this year.)

The dance floor!  Sorry for the color in this photo.  All looks quiet now... but later that night when the dancing started this place was rocking!

This is a quilt I finished for my quilt guild.  It will be donated--most likely to the domestic violence shelter.  It is "toddler-sized".  The flowers were "cheater blocks" and the owls were made with the Big Shot.  The eyes are two scallop circles and the beak is the pennant die.

The wings were made with the Scallop Square die.  If that makes you scratch your head, try this.  Cut a strip of fabric about 5 x 9 inches.  Fold it in half, across the 5 inch side.  Place the fold across the Scallop Square so that the fold lies between the first and second scallops on one side.  When you run it through the Big Shot, and open it up, you'll have almost double the length of the square!  Cut that rectangle in half and angle it across the block for wings.  (You'll need to trim away the excess after it is stitched.)


My final "warm thing" to share today is February's quilt block for my Block of the Month Class.  I called this a "Hobnail Vase".  Next month will be the final class--and then I'll put the quilt together.  Or maybe I'll start putting it together before the class--I can't wait to see how it turns out!

Happy Stamping (and Quilting)!
Wendy

Friday, January 27, 2012

a new addiction....

Hello friend!

Yes, I have a new addiction.  The good news (which is also probably the bad news) is that it supports all my other addictions.  Each and every one of them!  (thanks for introducing me, Deb!)

This new addiction is www.Pinterest.com.  It's a virtual bulletin board, and it is way cool!  Have you ever seen a photo on line, and then wanted to go back and find it again--but couldn't?  With Pinterest you can "pin" that photo to your board, and you will always have it.

Happy Stamping!
Wendy

Sunday, January 22, 2012

Wonky Pound Sign

Hello friend!

Recently I saw a quilt block that was so simple, I couldn't wait to try it.  After I made a pillow with the technique, it occurred to me that the same idea would be an interesting way to make a card.  These are some of what I came up with while playing with the idea:


Tomorrow my "Card Club" is coming, and this is a technique I will teach them.    It is so easy and I think it looks great.  Start with a piece of designer paper (the green pattern in both samples).  Use a paper cutter and cut across the designer paper twice so it is now in three pieces.  (You could make these cuts evenly spaced and parallel, but I like the odd angles you get when they are irregular.)

Glue the three designer paper pieces onto another piece of card stock.  Trim the edges even.

Turn the designer paper and once again cut twice across (opposite of the first  two cuts) in the same manner.
Glue the three designer paper pieces onto a third piece of card stock.

Trim the edges.  In the "Thanks" sample, I cut the edges of all layers even, but in the "Thanks So Much"    sample I cut the third layer so there was a border around the piece.

If you make something with this idea, I'd love to see it!

Happy Stamping!
Wendy

Wednesday, January 18, 2012

Hello friend!

Here are two cards made with the new Paper Doily Large Sizzlets Die from the Occasions Mini Catalog:


Happy Stamping!
Wendy

Saturday, January 14, 2012

don't need to watch more football this year....

Hello friend!

Well, my Pittsburgh Steelers got beat last week, so my football-watching days are done for the year--better get to scrapping, and stamping, and quilting, and posting while the guys are watching the playoffs!

This morning the Quilt Class was all about the Dresden Plate block, using the new Dresden Design Bigz XL die from the Occasions Mini Catalog:


The die cuts the traditional round blades, but I also wanted to show how to sew them to be pointed blades.  It is surprising how much easier this block becomes when you die-cut the blades instead of cutting them the old-fashioned way.  Since you can cut up to eight layers of fabric at a time, you can cut all sixteen blades in two passes through the Big Shot!

Since I retired, I've been making thank you cards... and I need to finish sending them out now.  Here is one of them using some new products:

The "Thanks so very much" on this card is from the Outlined Occasions Stamp Set" which is in the Sale-A-Bration catalog this year.  (Sale-A-Bration begins on January 24, so let me know if you didn't get your catalog.)  It is a little difficult to see in this photo, but at the bottom of the card are embossed hearts made with the Big Shot and the Adorning Accents Textured Impressions Embossing Folder, from the Occasions Mini Catalog  which began January 3, 2012.

More samples coming soon!

Happy Stamping!
Wendy

Sunday, January 8, 2012

Still here... I promise!

Hello friend!

Hope your Christmas and New Year were wonderful!  I have so many things I have wanted to post here, and I think about it a lot, but things have been topsy-turvy in our house....

I retired on December 31, so that was very exciting!  My new job started the following Monday, and many people said "take some time off" but honestly, I didn't feel it was necessary.  Unfortunately, on my 2nd day of work I got a phone call that Tim was in the emergency room.  What a scare!  Thank God, it wasn't the heart attack he thought he was having, but very high blood pressure.  He's on meds and going to a doctor this week to follow up, so we're heading in the right direction.

Later this week I will try to post more--but I'll leave you with a couple of cards.  The first was the card I made for customer gift certificates this year  (did you receive one?):


It opened like this, and the certificate was on the right:

Then I needed a birthday card, and decided to copy the idea:


Happy Stamping!
Wendy

Wednesday, December 14, 2011

Hello friend!

Nick turned 18 (gasp!) on Monday. This was the card I made for him.


Happy Stamping!
Wendy

Saturday, December 10, 2011

Co-Workers Birthday Cards

Hello friend!

These cards were made for co-workers this week.  I'm especially happy with the first one.  My friend Dave is a Civil War buff, and so I printed out a letter written on his birth date in 1863 for the background.  Lots of sponging with More Mustard, Sahara Sand, and River Rock and a Night of Navy background, and it was simple, but appropriate.
 This one was for Teresa.  I always try to make my December birthday cards very different than Christmas cards..... though as I look at this photo it seems you could take all the elements, change the colors, and have a great Christmas card as well.  Hmmm.  Gotta try that.....

Well, I need to get a very important birthday card made today.  Nick is turning 18 (gulp) on Monday.  How can that be?

Happy Stamping!
Wendy

Wednesday, December 7, 2011

A few Christmas things!

Hello friend!

I had a card club here last week, and these were their projects:

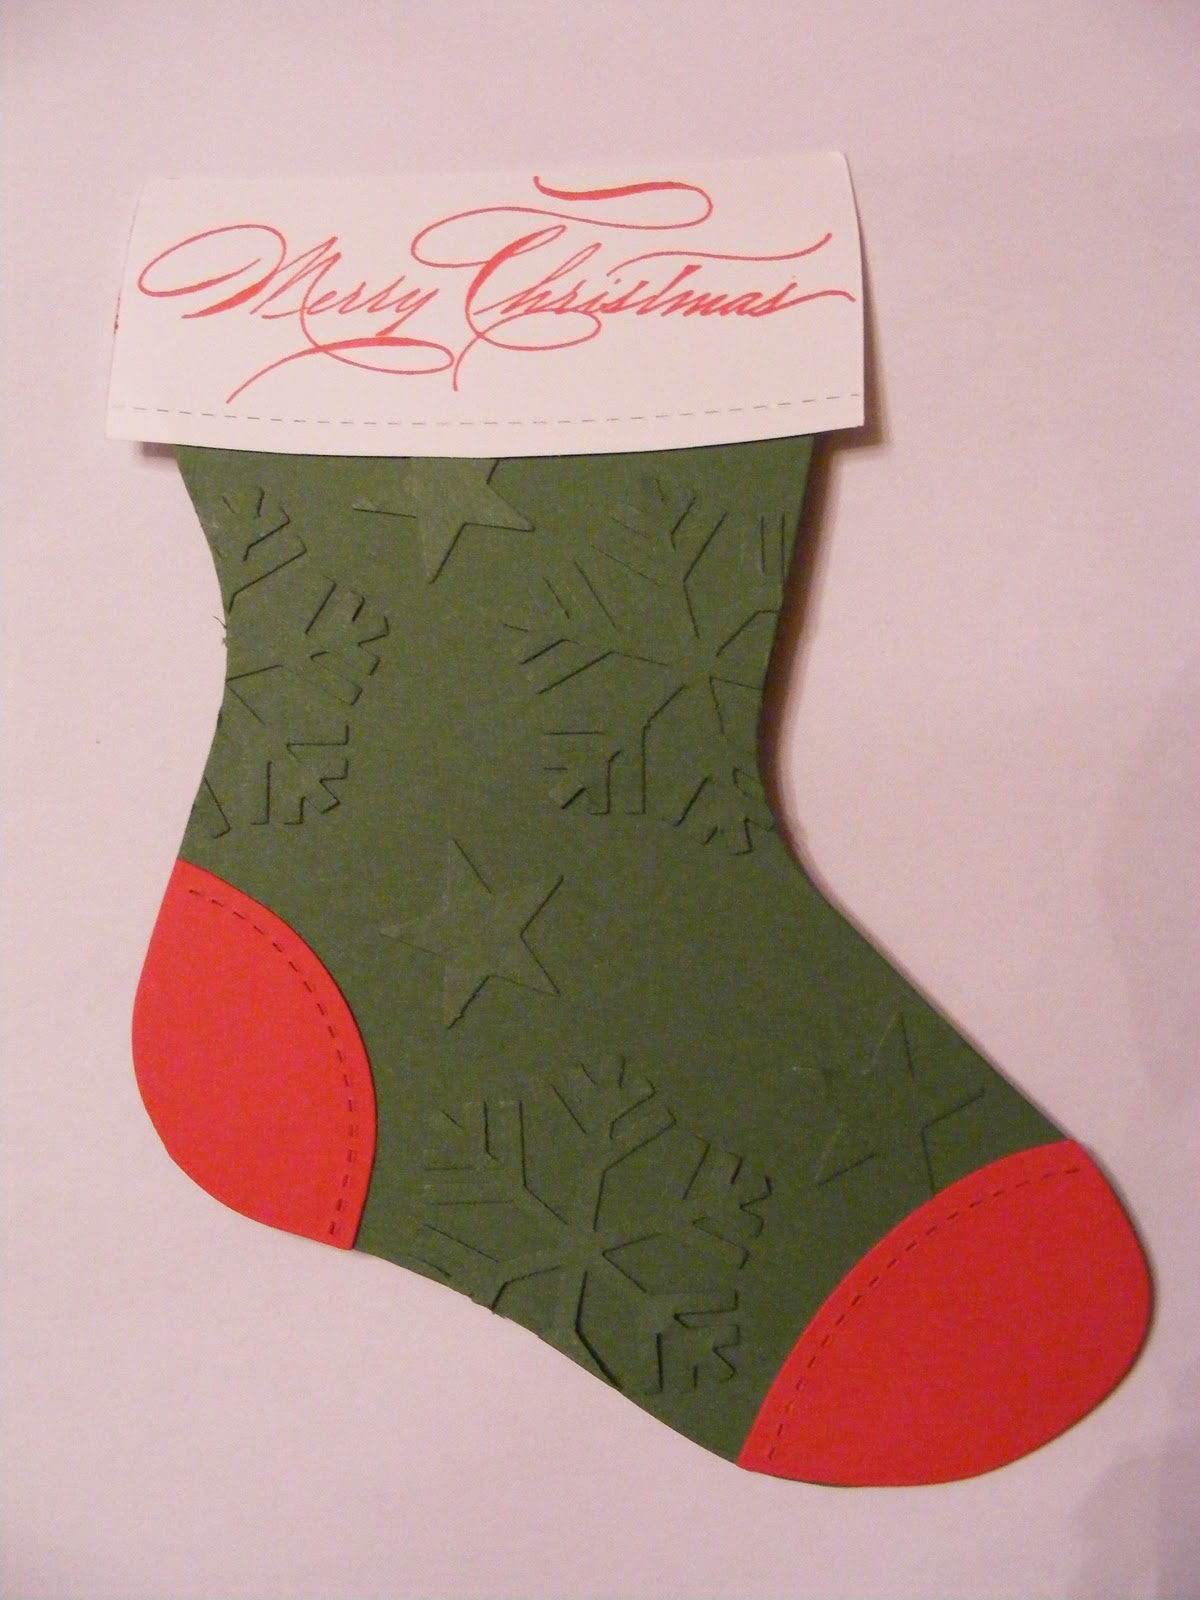
A Christmas stocking card,

and a fun candy holder.
 We wrapped small Hershey's bars (they were the small one you get about 8 or 10 in a package for a dollar)  Originally, I tried cutting the buckle out--but it didn't take long to realize it was MUCH easier to just cut a square the same width as the belt and glue it to the top of the gold buckle.  The white on Santa's suit is not a blurred photo--I didn't punch this particular one very well.  You get the idea.


The following photo really has nothing to do with Stampin' Up, but I still want to show you what I'm doing.  (trying to do--there are not enough hours in the day).  It is a sneak peak of a Christmas wall hanging I'm working on....  Everything is cut free-hand.  It still needs appliqued to the background... and all the little details added.... Yes, I need more time!


Happy Stamping!
Wendy

Monday, December 5, 2011

Where did November go?

Hello friend!

It seems I just finished my 12 Days of Christmas post... yesterday--but that was weeks ago.  November disappeared on me. 

Actually, November was a great month with lots of excitement.  My big news is that I'm retiring at the end of December! (there's a big smile on my face!)  In January I'll be working a part-time job I  am really looking forward to.

Now for some catch-up on projects:

We belong to the Old Uniontown Quilt Guild. The members make baby quilts and toddler quilts to donate. I've almost got this one finished to give-- I call it "Owls in the Flowers".

The pieces for the owls were cut with the Big Shot.

 The flowers look scallop-y like they could have been cut with the Big Shot, but they are actually pre-printed "cheater" fabric.  I love the way it came out!


Our niece had a birthday in November. She'd like to have a dog, so I made her a puppy card!  This cutie is all punched with Stampin' Up punches--isn't she adorable?  I just had to give her collar a little bling!

Happy Stamping!
Wendy

Saturday, November 12, 2011

Twelve Days of Christmas - Day Twelve!

Hello friend!

How can this be the last day of my Twelve Days of Christmas already?  This month is flying by....

Well, I saved my favorite project for the last:


This 18-inch pillow was made with the Holiday Stocking Bigz L Die, Holly Berry Bouquet Designer Fabric & Buttons, and Early Espresso 3/8" Quilted Satin Ribbon.  The applique was done by hand, but you could also use a sewing machine.  The words were also hand stitched.

If you like the idea of using the Big Shot and fabric to create home decor--you should join us for the Block of the Month class at 9:30 a.m. on the 2nd Saturday of each month.  (Which is today, by the way--come on over and see what we are doing!)

Happy Stamping!
Wendy

Friday, November 11, 2011

Twelve Days of Christmas - Day Eleven!

Hello friend!

This tree topper was inspired by the ornaments on page 28 of the Holiday Mini.


It  is made by rolling 2 x 3 inch pieces of the Holly Berry Bouquet DSP into cones.  (to make this easier, just staple the cones at the point where no one will ever see the staple)   Punch two holes in the scallop circle base and thread the ribbon through (I plan on tying the topper to the tree).  The cones are hot-glued to the  base and finished with  Real  Red card stock and Glimmer Paper circles.  


While this looks involved, it actually didn't take much time at all to put together.

Merry Twelve Days of Christmas!
Wendy

Thursday, November 10, 2011

Twelve Days of Christmas - Day Ten!

Hello friend! 

Can you believe it is Day Ten already?  This is one of my favorites:

The colors are Garden Green, Real Red, and More Mustard.  It was rather time-consuming, but I'm enjoying the way it turned out.  This started with an 8 x 8 inch canvas from the dollar store.  It was horribly ugly, so I painted it white, and used about every punch and Christmas stamp set I own.  (well, not really, but I did use a lot!)

 I also used lots of sparkly things, like Dazzling Details, Glimmer Paper, and Rhinestone jewels to make it fun.

If you try a decorative piece like this, I'd love to see it!

Happy Tenth Day of Christmas!
Wendy

Wednesday, November 9, 2011

Twelve Days of Christmas - Day Nine!

Hello friend!

Don't you love giving gifts in a gift bag?
1.  Bags are quick gift wrap--it only takes a few seconds to place the gift inside and fluff some tissue paper!
2.  Bags are "recycleable"--because they can be used over and over!
3.  Bags are fun... there is something about a handled gift bag that just makes it fun to give and to receive! 

Anyone receiving a gift in this bag would feel special:

The topper is made with Garden Green card stock.  I punched Whisper White circles and border and made another one of those fun medallions for the accent. 

The thing that really makes this bag stand out however, is the sparkle I added with two of my favorite Mini Catalog (page 41)  products:  Glimmer Paper and Dazzling Details!  While I always love glitter on projects, it can be a real mess.  These products take the mess away.   (If you are wondering where the Dazzling Details is, look at the circles.  I drew a line around each one.) 

I'll see you here tomorrow!
Wendy

Tuesday, November 8, 2011

Twelve Days of Christmas - Day Eight!

Hello friend!

Today's post is all about tags....  and I hope not to disappoint you.  We use a lot of tags around here when we are wrapping gifts, so my tags are practical and only semi-creative:


This is a label sheet (30 per sheet) that I've printed and then stamped.  Quick & easy!

Here is another tag:


For some reason beyond my control, this was rather difficult to photograph, and the Glimmer paper doesn't show to its best.  If you are wondering how I made the longer tag, look at this:

 Cut your strip the same width as the punch, and slide it into the punch from the front.  You'll need to grab it and pull it out like this, but you can make your tag about any length you like.

Happy Twelve Days of Christmas!
Wendy

Monday, November 7, 2011

Twelve Days of Christmas - Day Seven!

Hello friend!

If you've ever been in my house around Christmastime, you know I love to put trees in most every room of the house.  Here is an ornament for one of my trees this year!

This is made with two strips of Holly Berry Bouquet DSP that are 2" x 12".  They are scored every 1/4 inch with Simply Scored, and folded up (like a fan).  Attach the ends together to make a circle.  Place this "circular fan" on the table in front of you, and push it down flat onto the table--see how easily it creates this accordian ornament? 

My favorite way to hold it all together is with hot glue.  Cut a circle smaller than the finished ornament, and put hot glue on it.  Center the "circular fan" around this circle, and wrap your hands around the fan so you can bring the center together onto the hot glue.  It comes together very well--but I guess I need to learn to do videos so I can show you these things!

Add ribbon and a button, and voila!

Happy Stamping!
Wendy

Sunday, November 6, 2011

Twelve Days of Christmas - Day Six!

Hello friend!

Today's post is a little unusual!  Yesterday I showed you a decorated box that would be perfect for giving something small.  Cookies would fit nicely in the box--and here are the ones we made with our new cookie stamps.

You start by rolling out a small ball of dough (recipes are included with the stamps--we made the shortbread and they are delicious).  You roll the dough in sugar, then stamp them.


After they bake, they look like this:
It was difficult getting a good photo--especially since they were quickly being eaten!
Happy Stamping!
Wendy

You need to see this!

Hello friend!

There are some great specials going on with Stampin Up! right now.  You can see them here:

Stampin' Up! Demonstrator

They've extended the Big Shot promotion, so you can still earn a free Big Shot by becoming a demonstrator before the 11th.  And for hostesses they have something fabulous going on now--an extra $35 in free merchandise when your workshop is $350 or more!  Awesome!

Check them out, and I'll be back this afternoon with today's Twelve Days of Christmas post!
Wendy

Saturday, November 5, 2011

Twelve Days of Christmas - Day Five!

Hello friend!

This is one of our Kraft Gift Boxes.  They are a nice size, only 3 1/2" x 3 1/2", but there are lots of things you could put in here--and tomorrow I'm going to show you something that would fit perfectly in this box!

This box is very simply decorated with a strip of Holly Berry Designer Fabric, and a medallion from the Perfect Pennants Bigz L Die.  The stamped image is from the Tags Til Christmas set, and is punched with a Scallop Square Punch.

I'm just realizing I need to work with another color scheme--so far I've done a lot of posting with Wild Wasabi, Real Red, and the Holly Berry fabric & Designer Series Paper!

Happy Stamping!
Wendy